Friday, December 11, 2009
The Perfect Pencil
Here's the review from Pattern Review:
Pattern Description:
Burda Easy fitted pencil skirt with high or standard waist band option, back slit. I made view B with the standard waistband.
Pattern Sizing:
34-46. I sewed a 44.
Did it look like the photo/drawing on the pattern envelope once you were done sewing with it?
Yes!
Were the instructions easy to follow?
This was my first Burda pattern. Now I see what people mean. Half the instructions are missing, however there are helpful photos. If you have made a skirt before, this should be no problem.
What did you particularly like or dislike about the pattern?
I have been looking for the perfect pencil skirt. After hearing Gertie rave about this one, I checked out the reviews. All the reviews were glowing. They were right. It's the perfect length, the perfect fit, the perfect pencil skirt. It's a little hard to tell from the photo, but using the hem line provided on the pattern, the skirt ends right at the bottom of my knee without covering any part of my calf. I'm 5'6" (and a half).
Fabric Used:
Cotton twill with a little stretch from Fashion Fabrics Club in a dark blue grey. Not too stiff, not too light. I think I will make everything in twill from now on. It sewed like a dream. I barely needed pins. This is easily the best constructed garment I've made. The seams are perfectly straight. The zipper is perfect. I think it's due to the fabric. Twill evening dresses? Twill underwear? No? Okay, maybe not. But I highly recommend anyone needing an ego boost make something out of twill.
zipper:
Pattern alterations or any design changes you made:
This is the first time I've sewed a pattern and had it need no alterations at all. It fit perfectly. I have a small waist and big hips and booty. I always need to adjust things to fit my curves. Not this time. Heaven!
Because my fabric had some stretch to it, I mad the seams 7/8" instead of 5/8". I plan to make this out of a tweed woven next and I imagine I'll reduce the seams back down for a little more ease.
Also, the waistband was about an inch smaller around than the top of the skirt. I didn't want to ease the skirt to fit a waistband that instructions did not have me cut on the bias, especially because the skirt fit when I tried it on before sewing on the waistband. So I re-cut the waistband to be two inches longer - an inch to avoid easing the top of the skirt plus one inch for the extra tab where the button goes. It worked perfectly.
waistband tab:
Would you sew it again? Would you recommend it to others?
Yes, yes, yes! I plan to make a tweed version right away.
Conclusion:
Truly the perfect pencil skirt.
Tuesday, December 08, 2009
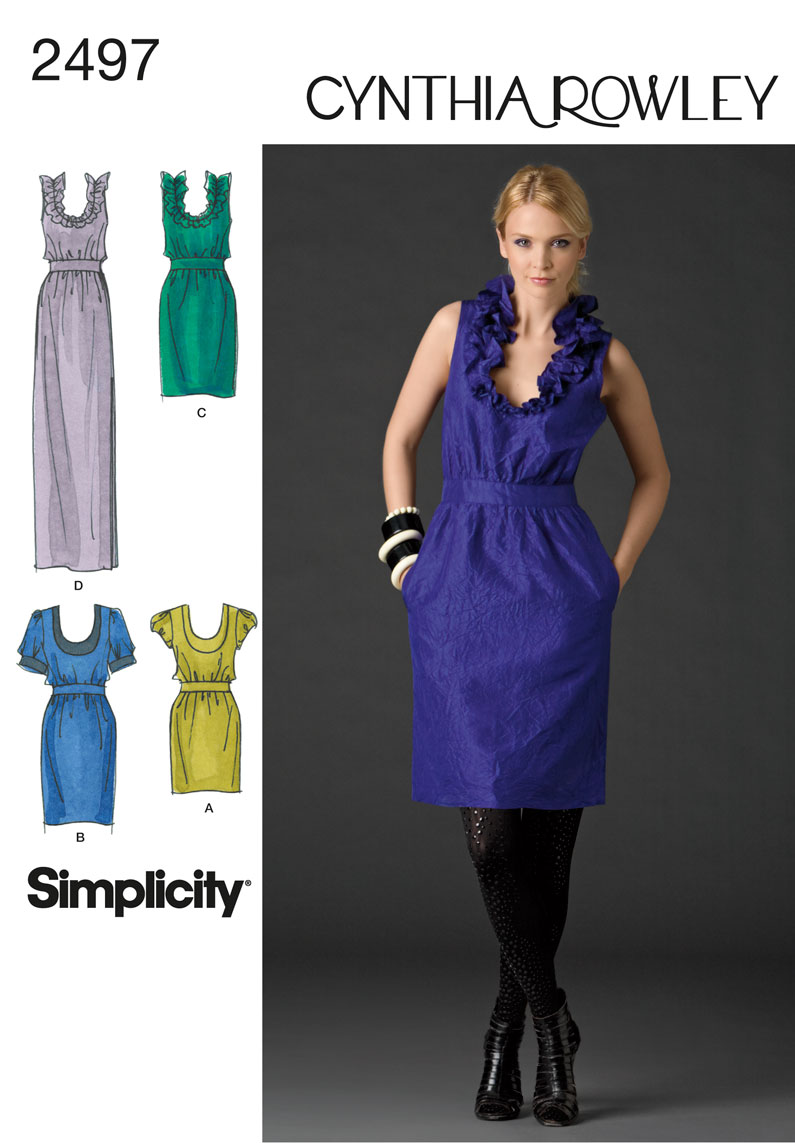
Simplicity 2497
So here's the story. I made the dress. I tried it on and asked my husband what he thought. He told me I looked like a clown and began singing circus music. Before I managed to throttle him, he reduced the insult to simply "it's just not flattering." Unfortunately, he was right. I have wide shoulders and wide hips, but a small waist. This style has a paper bag style waist - baggy above and baggy below the midriff band (which was a lot more narrow that I thought it would be). Without anything to highlight my waist, I look like a "refrigerator" (more throttling), "I mean rectangle." says the husband.
Then I saw FullertonRegan's version made into a tunic. I pinned mine up and it looked much better, so I cut and hemmed it into a tunic. It's better, but still not all that great. To make it fit better, I think I would have needed to make the shoulder wider, but the front bodice narrower (is there an adjustment for that?). Also, I could have made the midriff band about 4-5 inches wider so you could really see my waist. And finally I would add more room through the hips.
Front
Back
Ruffle detail
Zipper
On me (with matching clutch bag)
Back view
See how it just bags about the midriff band? Unattractive.
Anyhow the complete review is on Pattern Review if you are interested. I should add that Corey now says he likes it as a tunic. But he may just be tired of being throttled. ;)
Thursday, December 03, 2009
Photos of muslin
Here it is. The facing kept peeking out, so I stitched it down but the neckline puckered. The first time I sewed it in, it laid flat and beautiful, just inside-out. I must have cut it too small this time. Maybe when I make it from the good fabric I'll just line it and do away with the facing altogether.
Here it is on me. This photo shows the actual color better. Meh. Definitely needs tweaking.
Tuesday, December 01, 2009
Muslin for Simplicity 2511 (or the girl with alien eyes)
While waiting up 'til midnight so I could register for the series of upholstery classes at Austin City College, I worked on a muslin of vintage Simplicity 2511. Look at the size of the eyes on the (suicide) blonde girl on the pattern envelope. Scary. I made view 1. It is size 36 and I am a 37/38. I was going to grade it up slightly but I did a pin fitting with the pattern and it looked like it might work, so I went ahead with the original size and used 1/4 inch seams instead of 5/8. Well...I should have stuck with my original plan. It's a little too constricting through the shoulders and armholes. I'll grade up to a 38, use the 5/8 inch seam allowance, enlarge the armholes a bit and add an inch to the length.
It's made out of a navy slinky/crepey polyester with just the slightest bit of sheen from JoAnn's. It's soft and drapes very nicely. It would be more of a blouse and less of an almost wearable muslin if I hadn't sewn on the neck facing inside-out (so the interfacing side shows when you look inside and my trimmed seam edges threaten to peek out from the neckline). How did I manage that? (*sigh*) I think of sewing as sort of a big geometry project. I never really got geometry. I guess that's why I almost always sew at least one piece on upside-down, inside-out or backwards. I should try to think of projects as puzzles instead. I'm trying to decide whether to pick out the understitching and the seam and sew the facing back in the right way. That would take hmm...2-3 hours? Is it worth it for something that doesn't fit perfectly?
I went for something slinky to try out my new walking foot. Love! It made it so easy to ease the pieces together. Would it be cheating to use the walking foot on everything? Are there downsides to using a walking foot? Will I get used to it and have trouble if I attempt to sew velvet (like I'm planning to with the tunic from Twinkle Sews)?
Anyhow, I really like the shape of the blouse. It has 6 darts in the front and four in the back. It highlights the curves of my waist. It's hard to see on the navy, so I think I'll make the real thing in a lighter color to show off the detail. Maybe a cherry red? I spent a lot of time on the darts on this blouse. I have to say my sewing is getting better. That makes me happy.
BTW - I made it into the Upholstery class. There are only 7 spots and they usually fill up within hours of registration opening, hence the late night. I can't wait to tackle some of the more interesting upholstery projects I keep buying from Craig's List, much to Corey's chagrin. If all goes well, look for them on my soon (I hope) to be opened etsy site.
Update on the muslin:
I went ahead and picked out the stitching. I should get it back together tonight. I'll post photos when I do.
Sunday, November 29, 2009
Fast, Easy, Cute (Joyce don't read)
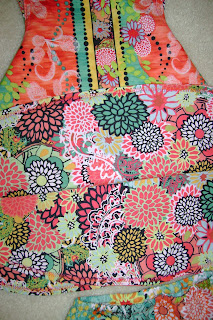
I just finished Sew Baby Pattern 10, the reversible sundress and bloomers for my niece Kara for Christmas. It came out really, really cute, if I do say so myself. ;)
Here is the review from Pattern Review and some photos.
Pattern Description:
Reversible Sundress and Panties/Bloomers
Pattern Sizing:
6M-4T (I made the 18M)
Did it look like the photo/drawing on the pattern envelope once you were done sewing with it?
Yes
Were the instructions easy to follow?
Extremely
What did you particularly like or dislike about the pattern?
I made this for my niece Kara for Christmas. I don't think it took me more than two hours from start to finish, including tracing and cutting it from swedish tracing paper, so I can make it in a larger size as she grows.
Fabric Used:
Three different fabrics all from the Keri Beyer Proud series in turquoise.
Pattern alterations or any design changes you made:
None. I used my new double needle to topstich (with one orange and one pink thread). I used vintage buttons I bought at the City-Wide Garage Sale.
Would you sew it again? Would you recommend it to others?
Yes and yes. This is a great gift idea. It looks adorable and is incredible easy to make.
Conclusion:
Super easy, super fast, super cute.
Goodies from the City-Wide Garage Sale
Austin has a city-wide garage sale at the Palmer Events Center each month. I've never been before. Corey went once and said it was nothing but junk. The one this weekend is supposed to be the biggest of the year so I thought I'd give it a try. I wanted to see if I could find some cute buttons for the dress I'm making for my niece Kara. (Stay tuned for a post and photos).
Clearly Corey and I have different definitions of junk. Look at all the goodies I bought!
Two vintage patterns for 50 cents each, sizes 36 and 38 (I'm a 37) Woot! Look at the jacket on the McCalls pattern. Love!
Vintage buttons for $1 a card. Vintage mother-of-pearl belt buckle for $5.
Vintage fabric for $5 a pound. I think the floral will make a nice scarf, the purple a skirt.
Vintage Vargas pin-up prints including the famous 6-fingered girl.
I am a happy camper!
Sunday, November 22, 2009
Vintage Simplicity 4709 and more photos of Socialite Dress
Here is the review from Pattern Review for my vintage dress.
Pattern Description:
This is a vintage simplicity pattern. There is no date on the envelope, but I'm guessing mid-1950s.
Pattern Sizing:
This was a half size, 18 1/2. I did some modifications to make it work.
Did it look like the photo/drawing on the pattern envelope once you were done sewing with it?
Close. Some changes were purposeful. See below. But the skirt on the pattern photo looks much fuller than mine.
Were the instructions easy to follow?
Not too bad. Since it was a vintage pattern, it wasn't super thorough, but easy enough to figure out.
What did you particularly like or dislike about the pattern?
It was really easy to put together except for the zipper. It only has four pattern pieces and no facings or interfacings. The zipper is half on the bodice, half on the skirt, but on the side. The instructions had me fully attaching the bodice to the skirt, and then attaching the zipper above and below the seam, "breaking the stitch at the waistline." That did not make any sense to me. How are you supposed to use a zipper with a band of fabric through the middle? I left the waist seam open at the zipper, attaching the edges of the seam to the zipper tape so the zipper opening is above and below the waist seam. Everything else was a piece o' cake.
Fabric Used:
I used some inexpensive quilting fabric from JoAnn's. I originally ordered fabric from Fashion Fabric Club for this project, but it's been over three weeks since I placed the order and I got tired on waiting.
Pattern alterations or any design changes you made:
I moved the bust darts down an inch, thanks to Gertie's blog for Burda Style about essential alterations for vintage patterns. I also narrowed the shoulder straps an inch and a half and changed the front soft pleats to darts.
Since this was a half size (for more robust, petite ladies), I added some length to the bodice (since I am somewhat robust, but not petite). I read somewhere that half sizes are meant for ladies 5'2" to 5'3" and usually need between 1 and 4 inches of length added to the bodice for a regular sizing. Since I'm 5'6" I added 3 inches. During the baste fitting I realized that was way too much. I ended up taking off an inch and a half. I probably could have removed another half inch.
I had also added a couple inches to the waist, using one of my well-fitting skirts as a proxy. That wasn't needed either, I took 1 1/2 back off, and put a seam down the back so I could make a much needed swayback adjustment. And finally I took about 6 inches off the bottom.
Would you sew it again? Would you recommend it to others?
If I made it again, I would make the bodice more narrow, more fitted, and the skirt fuller.
Conclusion:
I really like the dress. It's not perfect, but my husband says it's his favorite of all the things I've made, so it must not be too terrible. ;) Pardon my deer in the headlights look.
And here a photos of me wearing the socialite dress.
Sunday, November 15, 2009
Socialite Dress Completed
Here is the review from Pattern Review:
Pattern Description:
Socialite Dress from Anna Maria Horner.
Pattern Sizing:
XS-XL (I made the Large. I wear a 10-12 in RTW.)
Did it look like the photo/drawing on the pattern envelope once you were done sewing with it?
Yes.
Were the instructions easy to follow?
Yes. They were written for a beginner, down to the tiny details. I did notice that at the step where the front neck facing is attached to the dress front, it didn't make it clear to attach the bottom of the facing instead of the top, which seemed counter-intuitive to me. I sewed it on upside-down and had to take it out and redo it. But, no other reviewer mentioned it, so maybe it was just counter-intuitive to me. After all, it wouldn't be an Audrey creation if I didn't sew at least one piece on backward or upside-down. ;)
What did you particularly like or dislike about the pattern?
It went together really quickly. I got it done in a day. The only thing I didn't like was tacking down the neck facing by hand. It took over an hour. (I did it while watching the tube.) My hand sewing is always wonky so I prefer to do things by machine if possible. I understitched the facing first, trying to avoid the hand sewing, but it still needed to be done.
Fabric Used:
Anna Maria's Volumes fabric in gold from the Drawing Room collection. I agree with the other reviewer who said this dress would be better in a less stiff, more drapey fabric.
Pattern alterations or any design changes you made:
None. There is a size chart on http://www.annamariahorner.com/. Check it out before choosing a size. If I had just read the finished dress sizing on the pattern envelope, I would have been tempted to make a size smaller and that would have been a mistake. It is a loose fitting dress as you can see from the envelope photo. If I were to sew it again, I would make a sway back adjustment but other than that the fit was good - closer fitting through the bodice, looser through the waist and hips, which allows you to put your hands in the pockets comfortably.
Would you sew it again? Would you recommend it to others?
I would recommend it to a beginner. If I were to sew it again, it would be out of a drapier fabric. I would also narrow the shoulder straps. I have wide shoulders, so thinner straps are more flattering on me.
Here's the back view:
Saturday, November 14, 2009
Socialite Dress
Still waiting for my fabric for the vintage dress, but in the mail today came the pattern kit I ordered (after the fabric for the vintage dress) from Anna Marie Horner, so I started on that instead.
The fabric is washed, pressed, cut and the seam allowances serged. The reviews on PR say this one goes pretty quickly so hopefully I'll finish it tomorrow. I'll post photos. Good night!
Friday, November 13, 2009
Lookie!
Thursday, November 12, 2009
Built by Wendy Skirt (again)
Since I am STILL waiting for my fabric from FFC for my vintage dress pattern, I took on a repair project. I ordered that fabric on 10/28. It's been 3 weeks! Has anyone else had this problem with FFC? In the past two weeks I must have ordered 4 or 5 other fabrics, just so I'm never sitting waiting without fabric for a project. :(
I made this skirt several months ago from a stretch tweed I bought at FFC for $1.99/yard. It is the skirt pattern from Sew U by Built by Wendy. I had a really tough time binding the pockets. So much so that afterward I bound the hem with inch-wide binding rather than 1/4 inch. Even so, I only wore the skirt once before the ragged edges poked through the bound edge at the pockets. The edges were bound in stretch denim left over from...well let's just say that skinny jeans + muscular thighs + squatting = about a yard of denim for small sewing projects. I ripped 'em wide open from seam to seam. Thank goddess I was home and not out in public! (*shudder*)
Anyhow, now that my serger is up and running, I decided to remove the pocket binding, serge those tricky unravelling edges and rebind. I also serged the side seams because I never got around to finishing the seam allowances. The skirt looks much better now. Although I think it looks weird with the wide binding at the seam and narrow at the pockets. I thought about redoing that too, but the skirt never fit all that well to start with. Either the waist is too high, or it's too small. It would be okay except that the pockets are quite high. They are really unusable where they are. If the skirt sat low on my hips they'd be perfect. I'm glad I did this exercise but I have enough of the fabric left over to redo the skirt from scratch. This time I'll go up a size and maybe I'll bind the edges with red.
I have to say I'm not a huge fan of the Sew U book. I like the clothes a lot, but the instructions are not easy to follow. They are not linear. Wendy jumps around describing how to do certain things at the beginning of the book, other things several chapters later. The book is not a good place for a beginning sewer to start. Now that it's been several months I might go back to it. The pants pattern included in the book is really, really cute. But that is a project for another day. I have at least three on the to-do list before I even think about pants.
Monday, November 09, 2009
Where Did the General Keep His Armies?
In his sleevies! (Yes, I am a dork in case you hadn't noticed.) ;)
After my Serger 101 class this past weekend at the fabulous new Stitch Lab location, Corey thought of the perfect first project--sewing long sleeves into a t-shirt so it looks like he is wearing a thermal underneath. The length of the sleeves always bothered him (a bit too short), so he thought with longer sleeves he'd get some wear out of it. And since I am no longer afraid of my serger, I was happy to oblige. Wasn't he a good sport about posing for photos?
It went pretty well except for a frustrating lesson in the importance of threading order. But since I was determined to be smarter than the thing I operate, I figured it out. I love serging! So fast. So easy. Now I can't wait for the fabric I ordered to arrive so I can start on my vintage dress pattern. You'd better bet I'm going to serge all the seam allowances.
If you live in Austin, you should definitely check out the new Stitch Lab. It just moved into an adorable converted house on South 1st. Leslie, the owner, is awesome and the shop is full of fun, pretty, fabrics and colors and surprises. It's a very happy place.
Thursday, November 05, 2009
Sari update
I've decided that I was too hard on myself in the last post. I felt like such a complainer.
I have been walking around today in my new top, admiring the beautifully bound armholes each time I glance at my shoulders. They really do look nice. My edge binding skills have improved tremendously. Also the top is really comfortable and I've received several compliments (to which I just can't help blurting out "Thanks, I made it!"). And to be frank, it's shiny...and sparkly. A girl can never be too sparkly. ;)
So overall, I'm pretty pleased with myself. I was caught up in the problems with the top and overlooked the good things. I am my own worst critic after all. But today I'm giving myself a break. Go me!
Wednesday, November 04, 2009
Not too sorry sari
I know I said I would make something in cotton next, but I still had several yards of silk sari fabric from my sister, so I thought I would try a simple tank top. I started with Simplicity 2599 but didn't add any of the ruffles or embellishments. The fabric was embellished enough! Since the silk was a little sheer, I decided to line it, a first.
It came out okay. Not one of my best, but okay. I took it in a little. I made the lining first and I wanted a little more of a fitted look, so I took in everything a couple inches at the waist. I don't know what I did, but it just doesn't quite hang right. From the front it looks fine, but it pulls a little at the back. It's not too tight, it just makes a line in the fabric across the back from side to side. Next time I'll follow some official pattern adjustment instructions rather than just contouring in the waist.
The only other problem I had was to attempt a rolled hem. I guess the edge wasn't straight enough or I didn't practice feeding the fabric through the foot enough. I ended up irreversibly chewing up the bottom of my fabric. I had to cut off about a half inch and start over with a traditional hem. I then had to take out and re-hem the lining because it was longer than the tank.
The silk wasn't too hard to work with. Here are a shots of the lining and a close up of the button detail. A nice touch, I think (although the smaller covered button dritz kits don't seem to work as well as the larger ones).
I know I need to keep sewing to get better, but sometimes I get impatient. I am very much looking forward to the two sewing classes I signed up for at the Stitch Lab. I hope that I might improve faster with some professional guidance. Here it is on me.
Next project will be to make this dress in a grey cotton twill with yellow binding at the edges. It it goes pretty easy, I might even attempt the little jacket.
See...it says "Simple to make." Here's hoping. :)
Saturday, October 31, 2009
Back on the Horse (Joyce don't read this)
My latest sewing project was an easy one to get me back on the horse after the problems with the last few. Last month my sister Joyce surprised me with a box of beautiful sari fabric. A note said she had meant to make pillows for her couch but never got around to it. (Keeping track of a one year old will do that to you, I imagine.) So she sent me the fabric hoping I'd get some use out of it.
I made her those pillows for her couch with tassels at the corners and invisible zippers. I'll send them for her birthday in December.
One gift has been crossed of the list. Now there's just my father's December birthday, everyone's Christmas presents, and Corey's and my nephew Caden's January birthdays. If anyone has suggestions on what to make, please speak up!
Here is a detail shot of the fabric.
Subscribe to:
Posts (Atom)